


Visualising An Artefact Hunting Pattern
Nobody likes to peer at long lists of Rotacol coordinates. So here's a visual explanation of how artefact hunting patterns are built, and why they work. Warning: this article has some maths in it!

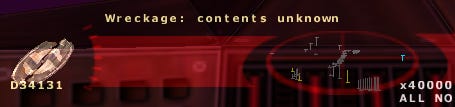
You can find artefacts flying randomly through Jumpgate sectors: they register as yellow ‘unknown wreckage’ radar signatures. It’s just not very likely you’ll find them with low-rank ships, by the main routes, because of the limited radar range. Artefacts sometimes spawn fairly close to a gate or a navigation point, but they’re likely to get picked up real quick, leaving those in the far reaches of space. Once you can fit a size 4 radar, like the Sentinel, your odds will increase massively.
If you’re serious about artefact hunting, you’ll likely want to know about “hunting patterns.” Those are collections of Rotacol coordinates defining a route the hunter will follow to maximize, or even guarantee, that they’ll make a find in a reasonably short amount of time. Let’s look at how such a pattern actually works.
Some Basics About Artefact Spawning
Artefacts may spawn in any non-station sector.
There is always one and one only in such a sector.
The artefact will spawn at coordinates within the (-100, 100) range in each tri-dimensional coordinates.
Let’s clarify a bit that last point: Jumpgate sectors are three-dimensional euclidean spaces using a cartesian coordinate system. This is quite the norm of level designs in 3D games. One might assume the coordinates were always available to the devs as a debug setting in the game engine. As players wanted better ways to navigate and survey sectors, the devs decided to simply create a game item and some commands to give every player the ability to access their debug tool. The Rotacol was born. At least that’s my theory.

So, our goal here is to navigate a cubic space spanning from [x=-100, y=-100, z=-100] to [x=100, y=100, z=100]. If we can fit a great radar like the Night Watchman, we fortunately don’t need to travel all the way to those remote points: we can see them sitting not more than 50K distance units away. I am also not sure it’s possible for an artefact to actually spawn at [100, 100, 100]. My (admittedly limited) experience of actual spawns so far seem to place them much closer always, possibly within a 100K units radius spherical volume centered on the zero-gate. If you know more than I do, please do comment and share your knowledge!
Since I mentioned the zero-gate, I also must explain this, since it is important to understand where to start: each sector has a jumpgate placed at the point with Rotacol coordinates [0, 0, 0]. Many patterns assume you start at this point. You can just look at the rotacol display to find it, or type /rotacol 0 0 0 and navigate there (spoiler warning: there’ll be a jumpgate there).
An Example Pattern: Clanlord’s Triple 50
I’ve used Clanlord’s “Triple 50” pattern with success in my artefact hunting experiments (thanks
for sharing it with me). This pattern works fine with the Night Watchman radar. Here’s how it looks:
(clanlord triple 50)
[pilot 1]
50 50 50  leg 1
50 50 -50  leg 2
50 -50 -50  leg 3
50 -50 50  leg 4
-50 -50 50  leg 5
-50 -50 -50  leg 6
-50 50 -50  leg 7
-50 50 50  leg 8
As you can see, it has 8 points, not counting the zero-gate. It’s formulated the way it is to be compatible with JGRotPro, which I don’t use. I like this pattern because it’s very simple to type those coordinates directly in a rotacol command, without using JGRotPro.
Now that we’ve got the pattern in front of us, and we understand how the coordinates work, we can draw the path the pattern defines.

We map our coordinate system with the zero-gate at its center (red dot), and navigate our ship to each of the 8 points in order. This forms a cube 100K units across, centered around the zero-gate. 3D shapes like this cube are made of vertices and edges. The pattern makes us visit each of the cube’s vertex, following along the edges. Once we reach point 8, we’ve completed the pattern, and if we payed good attention to the radar, we should have found at least one artefact already. We now have the option to go back to the zero gate, or to point 1 of the pattern.
To better understand the read radar coverage of a pattern, it can be useful to look at our 3D world from the side for a bit. Although our radar range is a sphere, what really matters is the sphere cross-section, which limits the expansion of our coverage as the ship moves in a straight line. As you can see from the graphic below, our radar cross-section from travelling along the edges of the cube leaves a gap in the center, where the zero-gate is, and some valleys in the middle of the cube’s faces.

Here, I’m using a 10K units grid centered around the zero-gate. The green surface shows how much of the 200K square surface is covered as the ship moves along the edges of the 100K-size cube defined by the pattern. It really is most of it. Part of the valleys are in fact covered when we change heading, circulating each face following a U-shaped trajectory. This is easier seen if we map the radar coverage in 3D.

The fact that the Night Watchman range is 54K and not 50K means we get very good coverage of our 200K cube, with the exception of the center gap, which we can visit when we’re done arty-hunting.
That said, it’s important to understand that the coverage area grows by the square of the radius, and the consequences of that. One good way to understand this is to ‘unfold’ the path taken by our ship following the pattern into a straight cylinder. Since the artefact will spawn in a 200K-side cube, this gives us a volume of 8,000,000 cubic kilo-units. With a Night Watchman, the circular coverage area (the base of our cylinder) is 54^2 x π = 9160 square kilo units. We can divide 8,000,000 by this, which gives us a cylinder height of 873 units. This is the distance we must travel to fully cover a volume equivalent to that of the cube. This is approximate, since we can’t perfectly fit a cylindrical volume inside a square, but this roughly tallies up with our Clanlord Triple 50 pattern: we are indeed travelling around 800 units, and getting a note quite perfect but near-complete coverage with that.
We can now do the same calculation using a 35K range Knocker radar. This will show that we’d need to travel well over 2000 units to cover the same cubic volume. In reality, it’ll be a fair bit more complex as we’ll need a lot more zig zags and hence points in our pattern to cover the cubic volume. When it comes to arty-hunting, radar range truly is king!
Another benefit of the larger range is that it considerably increases the odds that you will find a new artefact immediately after harvesting one, because in this case, you gain from the entire radar volume, not just the circular cross-section, and the volume grows with the cube of the radius, not the square.

The table above shows that the Night Watchman’s radar volume is well over 3 times that of the Knocker, and significantly better than the next best option. Starting from scratch, your odds that an artefact falls in your radar volume are one out of twelve, versus one out of 45 times for the Knocker. So, in theory, you should get one “free” artefact find with every 12 artefacts collected, if you equip a Night Watchman!
What Next?
Now that we properly understand patterns, it opens up some new options:
Better navigate patterns in a 3D space to adapt circumstances,
Better cooperate with other pilots when arty-hunting in a group,
Understand how to adapt a pattern to lower radar coverage,
Create your own pattern.
Happy hunting!