

Getting Started With Jumpgate
Getting Started With Jumpgate
It's not rocket science!

Welcome back!
Yup, Jumpgate ain’t dead! If you’re here, most likely you gave the ole space shuttle a spin many years ago, like I did. And it’s so long ago, you only have this vague memory it felt really good to fly in space. So how hard is it to jump back in? Well, not too hard, it turns out. If you went to jumpgate-tri.org and felt confused, let me try to help with a few steps.

1. Download the client
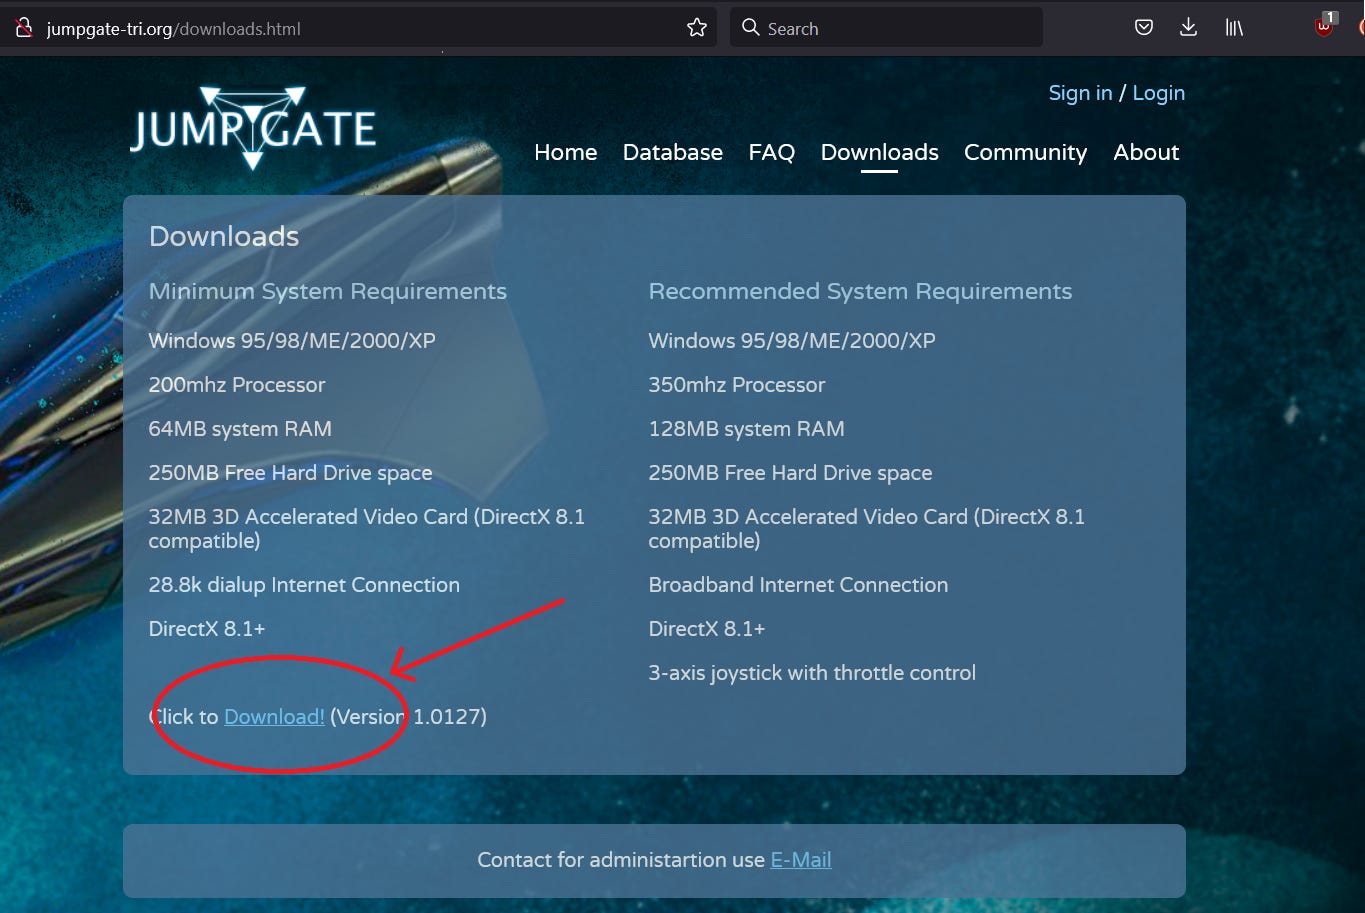
The first step is to hit the website and click the download link. You don’t need an account to do this. Since the game is so old, it should be a pretty fast download on a modern internet connection. Modern Windows operating systems are able to run the game in compatibility mode, but there can be gotchas, so let’s see if your hardware will run this first, before we proceed with account set up.
Once the download is complete, you’ll find an archive in your Downloads folder.
2. Unpacking the RAR
I bet it’s been a while you’ve dealt with a RAR archive. Maybe you don’t even know what they are! Read on if that’s the case, or else just unpack and skip ahead to the next chapter, as I’ll explain how to extract the files in this one, just in case you aren’t sure.
RAR was a fairly popular archive format in the mid-to-late nineties, and still widely in use when Jumpgate was officially supported. It offered a convenient way to split up archives between multiple floppy disks and put them back together, and typically better compression than ZIP too. Most people installed a dedicated application called WinRAR to deal with RAR archives. WinRAR is still supported to this day. Amazing how those old products are still around and kicking, isn’t it?!
Your operating system may or may not recognize RAR as an archive format. It it doesn’t, Windows will likely ask you what program to use to open the downloaded file if you double-click on it. If that happens, let’s cancel that and install some software to deal with the file. You can get WinRAR from the link above, but my recommendation would be to install a more flexible tool called 7-Zip. 7-Zip is fully free and open source. Besides dealing with ZIP and RAR, it supports many other types of archive files, and it’s a lightweight, easy-to-use little piece of software. You can get it from the official site.

Run through the set up steps for 7-Zip and let’s open the software. You can now start up 7-Zip File Manager, and use the navigation bar to find the location where you downloaded the Jumpgate RAR file.

Once you select it, it should look like this.

Now follow those steps:
Click on the Jumpgate folder.
Click the ‘Extract’ button in the toolbar.
Select a folder where you want to extract the archive.
Click OK.

Congratulations! You are now a 7-Zip user! Next, let’s get this baby started.
3. Launching the Jumpgate executable
Let’s navigate to your extracted Jumpgate folder. Unlike most modern PC games that you set up through Steam or come with an uninstaller, this distribution on Jumpgate will run straight from your now-unarchived folder. Launching the game now that it’s out of the archive should be simple… Just find Jumpgate.exe in the folder and double-click it.

If everything’s perfect, you should see the screen above! Woohoo! Good news, this was the hardest part!
Now there may be a couple hiccups. First of all, the game may not start at all. Secondly, the interface may not look all that good like on my screenshot. The main cause for this seem to be that many modern screens don’t support the game’s native resolution, 800x600. Luckily, there’s another handy little utility we can use to try and deal with this: DxWnd.
That said, if things work great for you so far, you don’t even need to worry about DxWnd, unless you’d like to play in windowed mode and/or do some screen recording. If that’s what you’d like to do, you can read on, but if you’re happy to run the game like this, you can skip the next chapter on DxWnd entirely.
4. Running Jumpgate in DxWnd
You don’t need to follow these steps if the game launches fine and looks good at this stage. If so, feel free to skip this chapter.
If the game did not launch, or if you want to run it in windowed mode, I’ll explain how you can set it up.
First off, let’s download DxWnd.
DxWnd is described as a ‘Windows hooker’ but I swear it’s nothing dirty. What this means is that it will pretend to be a DirectX compatible device to satisfy a DirectX executable like Jumpgate, and act as an interface to your modern operating system display requirements. DxWnd is a volunteer-maintained project, also free and open source. You can download it from Sourceforge.

Now, coincidentally, DxWnd comes in a RAR archive, so it’s a good thing we set ourselves up to extract RAR earlier! Once you’ve downloaded DxWnd, you can follow the same process of opening 7-Zip and navigating to the archive, then extracting it to a location of your choice. Let’s now go to the extracted location and fire up DxWnd.
This will give you a tiny little window with not much to look at.
There are two choices for you now:
Read the DxWnd docs and figure out how to configure Jumpgate.exe on your system.
Try my config and see how it goes for you.
I went with option 1 but quickly gave up and borrowed someone else’s config I found somewhere. I’m afraid I don’t quite remember where I found it now, but if you published one at some point and want some credit, do reach out and I’ll edit this… thanks for the help, kind stranger :-)
If you chose option 2, just click the link above, or this one, and drop this Jumpgate.dxw file in a convenient location. This is just a tiny config file for DxWnd: it tells it how to set parameters for a specific executable. To load it up, go to DxWnd and chose File > Import. Select Jumpgate.dxw and this will create a shortcut for Jumpgate.
Unfortunately, you won’t be able to use this shortcut rightaway. This is because I don’t know where you will extract the game folder, and I don’t know your screen resolution, so you’ll have to adjust those yourself. To do this, right-click on the shortcut in the DxWnd main panel and click ‘Modify’.

All the settings should be good to use, except for the Path of the executable, and the resolution.
For the path, just select Jumpgate.exe from where you extracted the game, or copy the executable path in this box.
For the resolution, you will want to adjust the Window initial position and size here. These depend on your screen resolution, as you will want the game window to fit within your screen. Unless your screen is truly ancient, this should be as easy as setting width and height to 800 and 600, by entering, respectively, “800” in the W field and “600” in the H field. This is guaranteed to match the game’s expectation, and also will not spill over the edge of your screen. However, it can cause the game window to be a little bit tiny and lost in the middle of your super-wide desktop. But if you want to take it one step at a time, you can go with this first just to check that the game will start. Click OK after adjusting the setting, and double-click the Jumpgate icon in DxWnd. Note that as long as DxWnd stays open, launching Jumpgate.exe from the folder will also invoke it via DxWnd.
If everything went well, you should now have a working windowed Jumpgate in front of you!
If you’re happy with the display, you can stop here, but if you’d like the game to use more screen space, we’ll need a tiny bit of math.
Jumpgate runs in a 4:3 aspect ratio, like many PC games from its area. It does not support any other aspect ratio. While it’s natively limited to 800x600 resolution, using DxWnd we can scale it up to a larger size. It just needs to conform to the 4:3 aspect ratio, meaning that for every 4 pixels of width, there must be 3 pixels in height. So if let’s say you are running on a 2K screen, your vertical resolution might be 2048 pixels. Perhaps you want to reserve some space for your task bar and so you don’t want to use the whole 2048 pixels of height. As a lot of modern screens are widescreen, the size you’ll be limited by is usually the height, so we can blow up the vertical resolution to use most of the height, and we’ll have some space left on each side of the game window in the width. If let’s say you decide to use 1,800 vertical pixels, let’s divide this by 3 and multiply it by 4. This gives 2400x1800 as the 4:3 aspect resolution, so you can enter this in the DxWnd config (i.e. set W to 2400 and H to 1800). Then, click OK in the Modify dialog, and try launching the game again.
At this point, the game should launch and look fine.
If the game still won’t work, please comment and describe the issue and we’ll try to work it out!
5. You can play in the Simulator
It was hard work to get to this point, so you should reward yourself by launching Jumpgate, click ‘Cancel’ when the game ask if it should connect to the server, and play in the simulator. Enjoy yourself and don’t forget to crash your ship in the station while no-one can see you!
6. Creating an account
Now we know the game can run on your computer, let’s create an account. Creating an account is free, you just need a working email address. Since Jumpgate works with an online server, you can’t play online without an account.
Let’s go back to jumpgate-tri.org and use the sign-in link to create a new account and pilot.
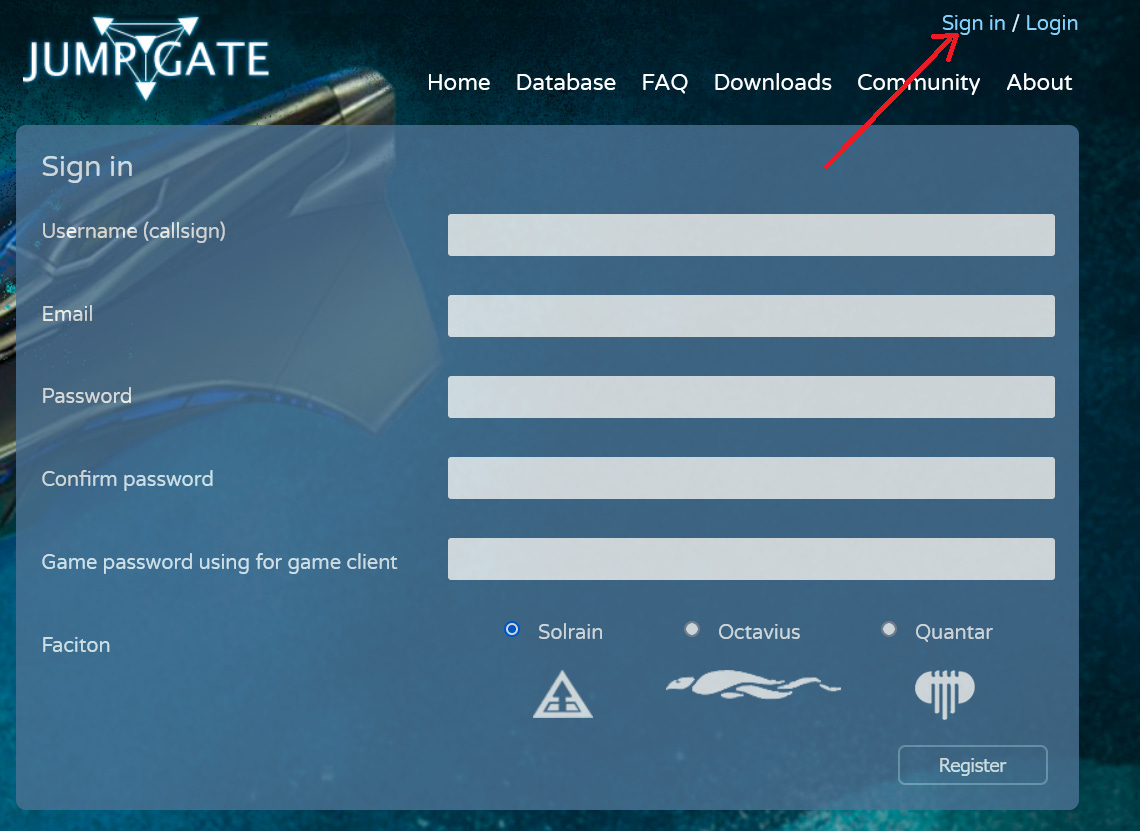
I believe this screen has caused some mild confusion for returning players, due to the lack of a user manual and some slightly broken english. I’ll explain what each field does.
Username (callsign): this is your pilot name, i.e. the name people will see as yours in the game. Since Jumpgate uses a rather dated chat system, and you may want people to be able to easily message you in the in-game chat, it’s best to be short and simple, but it needs to be unique. Your username can be made of letters, numbers, dashes ‘-’ and underscores ‘_’. It is case sensitive and you’ll want to remember it. If you want to check if a name is taken, you can use the database’s View All Pilots list.
Email: a working email address. A confirmation link will be sent to it, so it needs to be real.
Password: this is the password you’ll use, in combination with the username, to log in jumpgate-tri.org. I am not sure what are the password requirements, I just used the password suggested by my browser and that worked. Please note that this password is most definitely insecure, so you should not use anything sensitive, like a password you use for your personal email, facebook, or stuff like that. I’d highly suggest creating a password specifically for Jumpgate. You’ll see why in a bit.
Confirm password: needs to match exactly what you typed in the ‘Password’ field.
Game password using for game client: what this is is a separate password that you will type in Jumpgate’s game client, when you use the game executable to connect to the online server. Again, I am unsure what are the password requirements. You will be asked this password only once, and your browser will probably not remember it, so make sure you write it down. I believe it can be the same as your jumpgate-tri.org password if you want it to. You will not be asked to type this again either, so make sure there are no typo.
In summary, you’ll have one login (a.k.a. username or callsign) that you will use both for the website, and for the game client. When you log in the website, you will use your login with the ‘Password’ from above. When you connect to the game server using the game client, you will do so using your login and the ‘Game password using for game client’.
Faciton: this should read ‘faction’, obviously. That’s the fun part finally. Chose Octavius because it’s the best faction. Just kidding! Sorry if I offended any rock-licker or late=stage capitalist. Choose what you please, seriously. Oooooctavius.
Now hit up ‘Register’ and wait for the email.
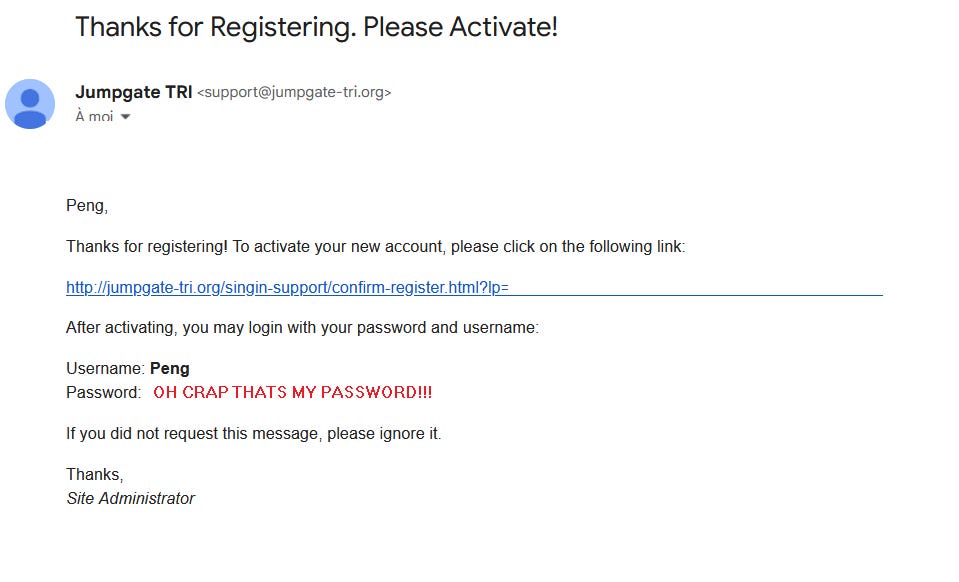
The email should reach you before too long, but don’t panic if it isn’t coming. Go look in your spam folder. This is where it ended for me. As you will see, the password you entered above is in clear in this confirmation email, which means it travels through the website and the database unencrypted and unsalted. This is not good practice, but it’s 20+ years old code and I’m going to give them a pass.
You MUST click the registration confirmation link in the email, otherwise you cannot proceed any further. After you click the confirmation link, you’ll have to wait a bit until your game account is created in the database.
7. Playing Online
This is the final step!
There are two different ways to check if you can connect to the game server. The first one is to load the pilot database, and see if your username appears in it. If so, it will work in the game client.
The second one is to just try to connect in the game client!
Launch Jumpgate.exe and when you get to the ‘Connect to Server?’ pop-up, click OK.

Enter your username in the appropriate field, and in the password field, enter what you typed in the Game password using for game client field - this is NOT the password that appears in the email (unless you entered the same everywhere).
Click connect and you’re in!
Unless you see this screen…

If that’s the case, click ‘Retry Connect’, make sure you didn’t make any typo in your user name or game password and try again. Also, make sure you clicked the confirmation link in the email, and that you can see your pilot in the pilot database.
If you did all this, and it still does not work, don’t panic!
You can connect to jumpgate-tri.org using the ‘Login’ link, and your user name/password (those are the same you got in the confirmation email).
From here, you’ll have access to a few profile options, including resetting your game password to a different value.

Hopefully this guide covers all the steps needed to get back into the game! But if not, please comment with questions, or look for the discord for additional help! Fly safe!